*Disclosure: I only recommend products I would use myself and all opinions expressed here are our own. This post may contain affiliate links that at no additional cost to you, I may earn a small commission.
In the last post, I talked about how I started to grow my own starter for Levain bread (sourdough). That was before we were leaving our home in Israel for the USA. In this article, I will talk about four simple, easy-to-implement steps you can make, to improve your home-baked sourdough bread.

Post Content
Sourdough Bread in San Francisco
When it was time for us to pack our lives and head to our new adventure in San Francisco, I had to pack my 6-month-old starter to come with us. I used a small shampoo container to take a little bit of starter with me. That’s really all you need. And all four of us traveled to the other side of the world (the cat, the starter, and the two of us).
We stayed at temporary housing for the first few months, waiting for our stuff to arrive later with the container. I didn’t have my standing mixer yet, so I just kept feeding my starter, building some San Francisco depth of flavors into my Tel Aviv starter. In the meantime, I purchased some decent bread from the city’s bakeries. It’s nothing like Paris.
The stuff you see in the supermarkets is packaged and contains sugar, conservatives, and other additives. Good bakeries are sparse, and the quality bread is expensive. For example, Tartine Bakery makes an excellent Oat Porridge Loaf, but it’s expensive ($11.75 as of now), and it’s hard to get without standing in line. Other bakeries have country loaves for about $4-$8, but they’re average. I found a delicious bread in our local farmer’s market called Bread and Friends – if you can try their sesame whole wheat loaf – it’s my favorite.

Baking the first loaves in a new country
Three months later, we settled into our own place, and I finally used my starter to bake the first loaf in a new country, using the regular recipe I had back home.


The bread was delicious but still needed improvements. Since then, in a few months, I’ve made a few changes, and the results were drastically improved.
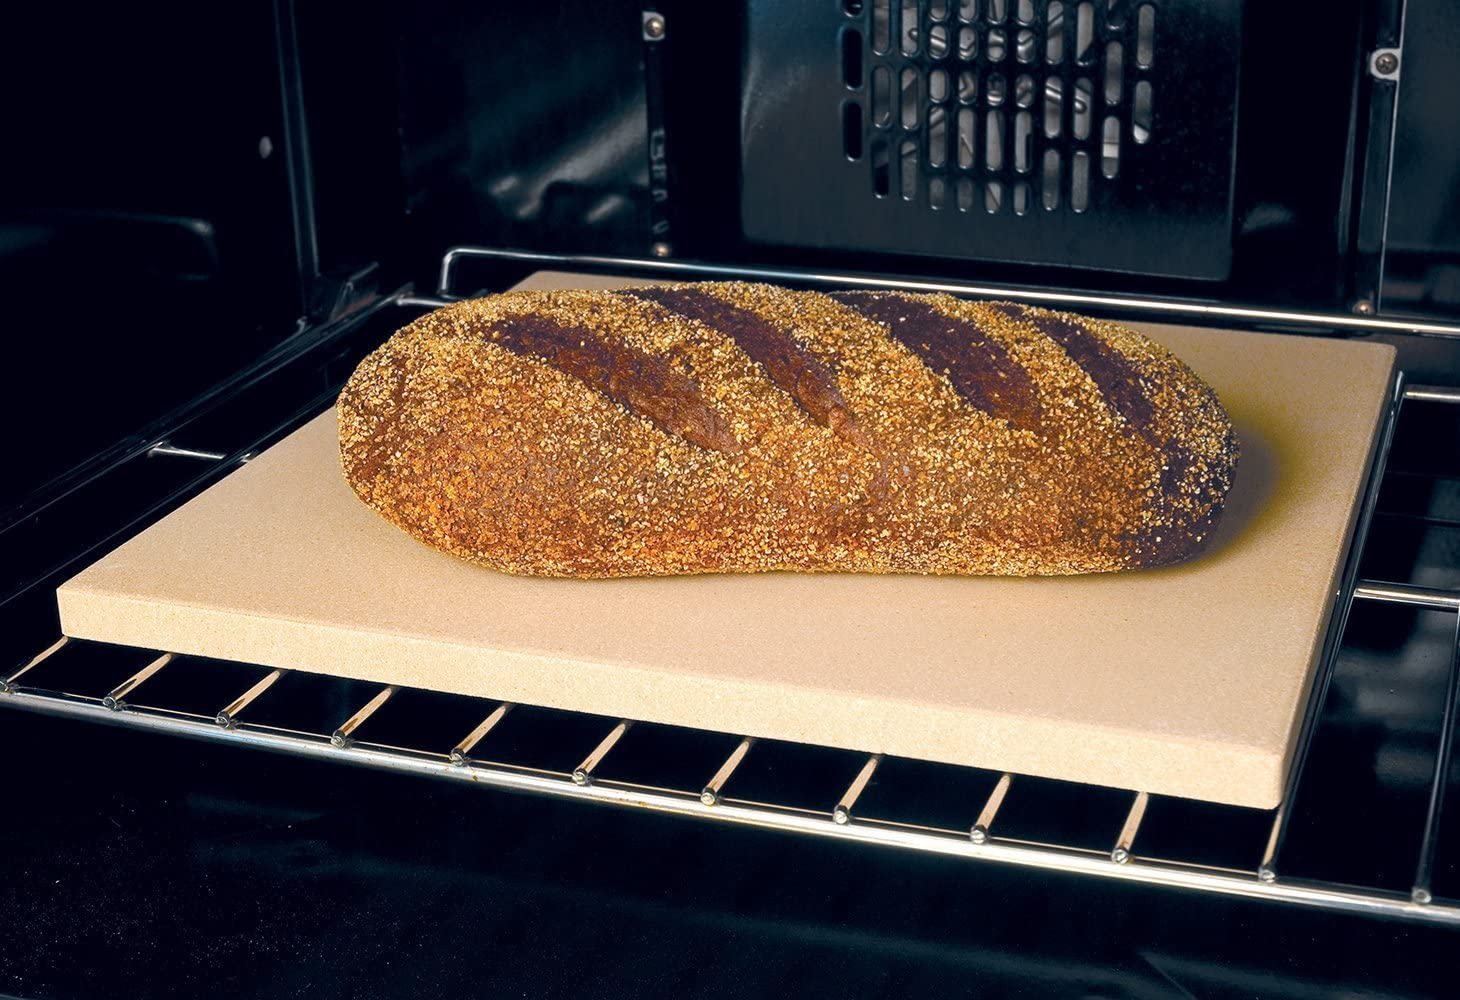
1. Use a pizza Stone on the Top Rack of your Oven
The first change I’ve made was with the oven itself. Our oven is gas operated and works differently from what I was used to; it took time to understand that. I was used to an electric oven with two heating sources, one on the bottom and one on the top. You can choose which heating source to use in an electric oven. But there’s only one heating source in this gas oven at the (almost) bottom of the oven. The little drawer underneath is used as a broiler. I’ve noticed everything I put in the oven gets an uneven bake – burned on the bottom and undercooked on top. I googled my issue and found a fascinating article about how heat travels in a gas oven and how I can improve its use.
The solution was to buy a large pizza stone (affiliated link) and put it on the oven’s highest rack. That way, the heat travels up, gets absorbed in the stone, and then projected back to the center of the oven, acting as an upper heat source (by radiation) if you start the oven running at least 30 minutes ahead. That little adjustment induced a big change! I grew very fond of my new oven, and the bread turned out a lot crispier on the outside. Pretty much everything I used it for turned out a lot better.

2. Read The Book
The second step I’ve made was to buy a new book about bread: Flour, water, yeast, salt by Ken Forkish (affiliated link). I don’t remember how I’ve come to discover that book but I’m pretty sure the picture on the cover was what really sealed the deal for me. Just look at that gorgeous looking bread!
I improved my starter by using the book’s feeding instructions, and I adopted its recipes for hybrid bread (using starter plus a bit of dry yeast to help the dough rise). This book is recommended for anyone serious about bread making, even a beginner. I also stopped using the standing mixer and adopted the book’s guidance to hand kneading, which is efficient.
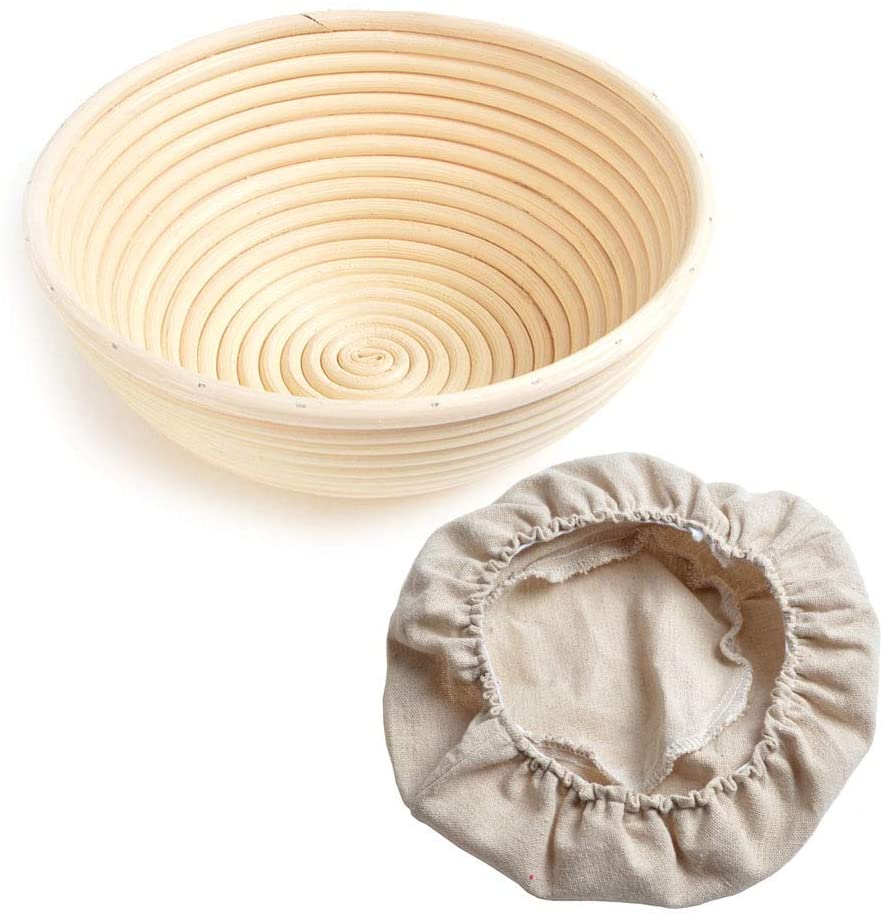
3. Use Proofing Baskets
Following reading enough of the book, the third change was when I bought two proofing baskets (affiliated link). That helped me easily flipping the proofed dough just before going into the oven. Plus, it made the bread look really nice, having visible flour stripes, making the loaf look a lot more professional.


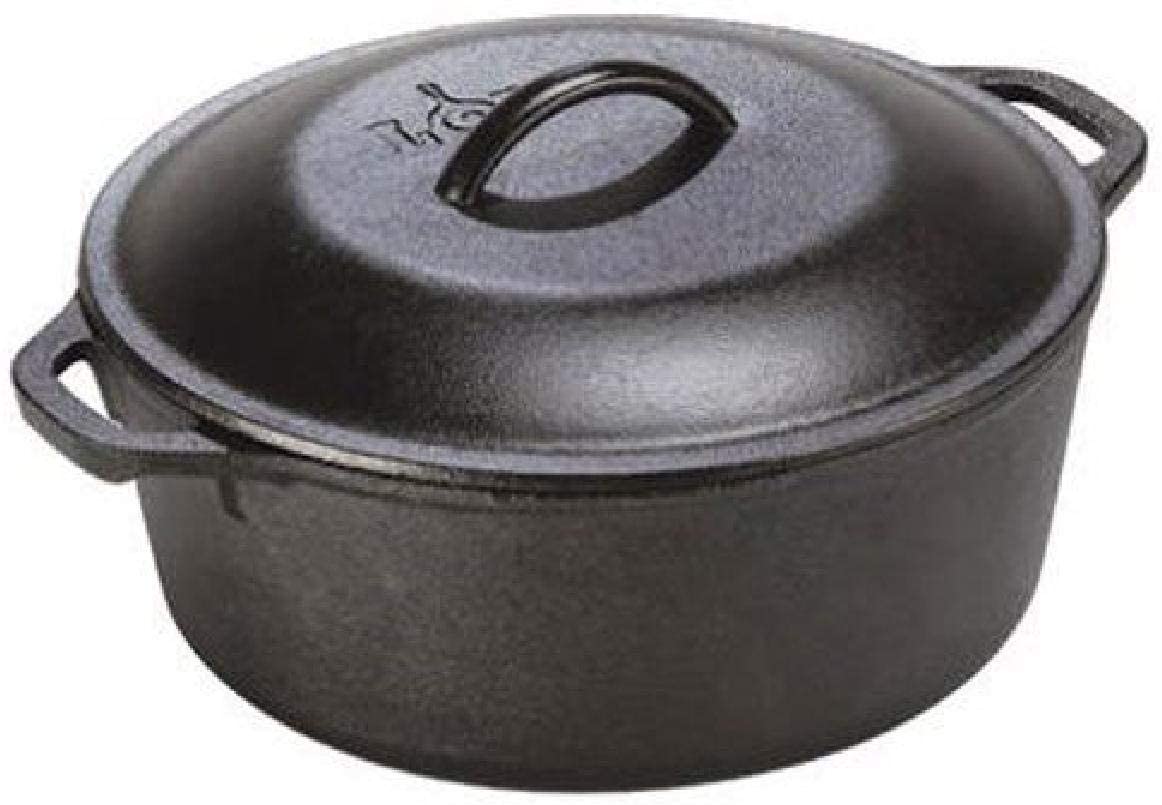
4. Bake in a Dutch Oven for the First Half an Hour of Baking
The fourth change was getting a Dutch Oven (affiliated link), which isn’t an oven at all, but a cast iron pot with a lid that goes in the oven. Baking the bread in a preheated iron pot and a covered environment mimics using an expensive steam oven. The steams that escape from the dough (high humidity dough) are kept inside the pot providing more hydrated baking without opening the oven from time to time and spray water in it, and losing heat. The lid would come off after 30 minutes of baking, leaving the rest of the time in the oven to brown and develop a real nice crust on the top.

Conclusion

How to Improve Your Sourdough Bread in 4 steps
Every time someone asks me to give some tips on how to bake better bread I give these 4 small steps that together bring a great result.
Instructions
- Buy a Pizza stone and put it at the top rack of your oven
- Read the book: Flour, water, yeast, salt by Ken Forkish
- Use proofing baskets
- Use a Dutch oven for the first half an hour of baking
Recommended Products
As an Amazon Associate and member of other affiliate programs, I earn from qualifying purchases.

Important to remember
Great bread requires a lot of attention, time, and love. If you don’t have either the love of bread making or the time and schedule it requires, think again if the whole thing is for you.
So how does the process of making a loaf of bread look like in detail? To be continued in the next post.


Hi, would you please specify where should i put pizza ! on the stone or under it ! as you said that it should be on the top floor, but it make me confused that where should i bake the pizza 🙂
thanks
Hi Hamid
The pizza stone is on the top shelf and the bread is baking under it, on the oven rack, inside a dutch oven (sort of an iron pot with lid). Hope this helps!